August 29, 2009

Back to old-time Marble Cake

I mentioned in my First Cupcake Venture post that I'm gonna do a few basic butter cakes to practise the creaming method since I really wanted to have a good baking foundation in case at any time, I need to venture on some "special baking projects". hehe.... anyway it's essential to have a good base, and I would recommend anyone who wanted to start cake baking to start off with butter cakes first, which in my opinion is the easiest and most basic to start off with.
I am now a subscriber of "Food & Travel" Magazine, after years of reading CLEO. I find myself shifting my interest towards the food and travel arena. Even though I don't really try out most of the recipes, I enjoy enriching myself with more knowledge of food, recipes, food preparation, etc or just oogling at the yummy dishes! I'm glad I have a hobby, and knowing for certain what I enjoy doing :)

This marble cake is featured in its Jun 09 Issue of 'fondmemories' theme. It features a good number of the good'o days recipes such as this marble cake, steamed chinese sponge cake (ji dan gao), kueh bingka ubi kaya (baked tapioca cake) and sugee cake which you can only get to some of them in traditional bakeries.

This recipes uses evaporated milk, as fresh milk was not readily available in the olden days, rendering a moist and flavourful butter cake. The main purpose of the marbled effect here is not to create a distinct two-toned cocoa and vanilla flavour but rather to produce pretty light swirls of cocoa and pink marble design. I'm sure mothers, fathers and grandmas or grandpa will love this cake, provided they do not have to watch out their cholestrol level. :P Marble Cake


Ingredients:

170g butter
180g caster sugar
4 eggs
200g self-raising flour
55g milk powder
1 tsp vanilla essence
1/2 cup evaporated milk

1 tsp cocoa powder
pink food colouring

for the rich butter cream frosting (optional)

100g icing sugar
2 egg yolks
125g butter
1/2 tsp vanilla essence
wafer roses

Method:
  1. Preheat oven to 160°C. Grease and line a 19-cm square cake pan.
  2. In a large bowl, beat butter and sugar until it becomes light and fluffy.
  3. Crack eggs, one at a time, into the butter mixture and beat well until well incorporated.
  4. Add essence. Mix in until well blended.
  5. Sift flour together with milk powder.
  6. Fold in flour alternately with evaporated milk into butter mixture until well blended.
  7. Pour batter into cake pan, reserving 1 cup of batter.
  8. Divide the remaining batter into two portions. Add a few drops of pink colouring into one portion and 1 tsp cocoa in the other. Mix until well blended.
  9. Spoon the cocoa-flavoured portion on top of batter. Use a cake skewer to run it through batter to create swirls. Do the same with pink-coloured batter.
  10. Bake for 50 to 55 minutes or until cake is cooked.
  11. To test, insert a satay stick into the centre of the cake. When it comes out clean, cake is cooked. If not, return to oven and continue baking until done.
  12. When cake is cooled, coat with rich butter cream (just mix all the ingedients and beat until well blended). (optional)
Recipe Source: Food & Travel - Jun 2009 Issue (Pg 48)


August 24, 2009

Soft Honey Buns

This is a sweet bun recipe that is so good that I wanna share with all the rest in case some of you have seen it at Happy Homebaker's blog but somehow had overlooked it.

Besides the difference in recipe proportions, and using honey instead of sugar as the sweetener, the method is the same as our usual sweet bread, no sponge dough or overnight proofing involved. Yet it yields amazing results, soft and spongy. I find that some commercial breads can either be too spongy (that has no bread structure) or too dense. This bread has just the right amount of softness and structure.

I really couldn't resist eating the same bread for 3 consecutive days and it still remained as soft. :) Thanks Happy Homebaker for sharing. Do hop to her blog for the recipe!


August 17, 2009

Milky Bar

If you have bars of white chocolate or white chocolate drops due to expire and you can't be munching on it aimlessly, make your own milky bar! It's so much more delicious than store-bought bars because you can be generous with the cookie bits and nuts. It serves as nice gifts for those who love milky bars. :)

All you need is just:

50g oreo biscuits
200g white chocolate
50g almond flakes (I used whole almonds and chopped into pieces)

Begin by breaking oreo cookies into chunks.
Toast almonds in preheated oven at 150°C for 10 minutes. Set aside.
Melt white chocolate in a double boiler. When chocolate has melted, add in oreo chunks and almond flakes and mix evenly.
Pour mixture into a 14.5 cm by 14.5 cm sqaure tray and smooth the surface evenly.
Leave in room temperature for about 45 minutes to let it cool before cutting into bars.

Note:
Do not let in cool be keeping in the fridge. It would be harder to cut it. You may store in the fridge after chopping into bars.

Recipe Source: 孟老师的一百道Home-made Cookie


August 11, 2009

First Cupcake Venture

Thanks to dear2, my blog is increasingly getting more visitor hits after he introduced several of his friends to my blog. :) I was overwhelmed when one of his good friend, Yan Li wanted to show me support by asking if I would like to bake a birthday cake for her son's first month celebration. When I heard that, I was like.....huh... she's making such a rash decision! :P

Well, I think she was being too kind and overly supportive! LOL.. Dear2 and I knew I'll definitely not be able to cope with such a BIG project. All along, I've only been baking cakes for my friends and family. I've never dare to consider selling cakes yet (except for cookies which I'm more comfortable at) even though I've dream of it. hehe...Eventually, Yan Li asked if I'll then like to make some cupcakes for her guests.

After much consideration and with dear2's support, I finally decided to give it a go. (He said if nobody eat he will finish all!) :D I knew I should be more confident, but to really bake and sell is a different thing altogether.

Weeks before the event, I already started doing 'intensive research'. I test baked a few recipes (vanilla and chocolate flavour) to find the best ones... blog-hop here and there... to get inspiration on the type of design...recipes of buttercream and icings. Have also emailed Ovenhaven and Happy Mrs Kwok for their advice. Really thanks so much for their replies and guidance! :)These were some of my testings and playing around with royal icing. Having not done any proper courses on cake decoration, I just have to make do with simple designs. 
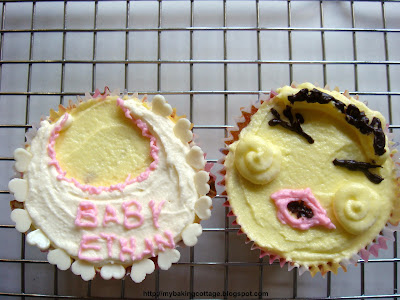
I tried this baby nib and smiley bird design but I found it too heavily loaded with buttercream and I wasn't able to get it frosted professionally. The idea comes from here. 
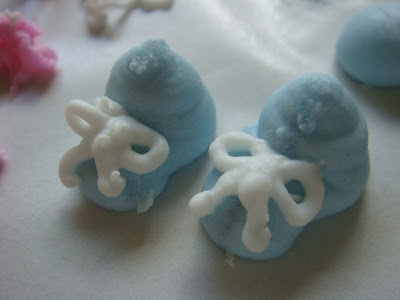
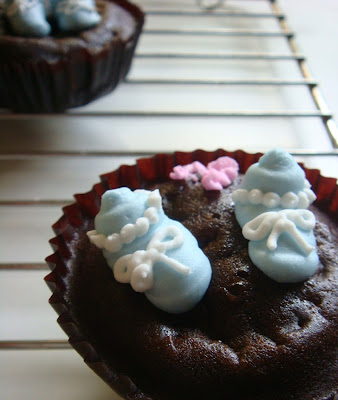
I learnt how to pipe this cute baby booties from
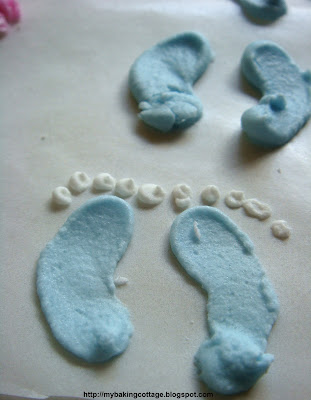
 here. Actual day arrived!
I spent the entire evening baking 40 cupcakes in three batches and by the time it was done, it was already past 8pm. Mum was forever right. I should started the cupcakes much earlier. (I wanted the cupcakes to be fresher so I thought the later I started it would be the better).

These were the final products.. :) sunflower cupcakes - chocolate butter cupcake with vanilla cream (tinted with orange colour) and chocolate chips. This was the easiest design. The piping wasn't good because somehow some cookie bits got stuck inside the nozzle so the entire pattern could not be piped out properly. :(

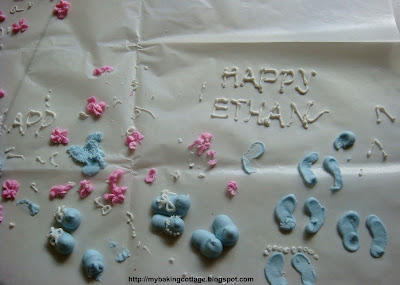
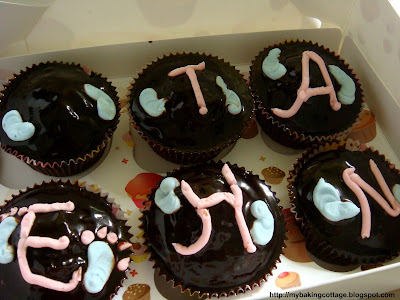
This should be the most delicious! Chocolate cupcakes with chocolate ganache and the letterings were written using royal icing.The blue patches were supposed to be foot prints but the icings were a tad too stiff so I had problem making dots for the toes so I just leave the patches as it was. :P


butterfly cupcakes (vanilla flavour) - I like this too. I sliced the top of the cupcake to leave a hollow depression, filled it with vanilla cream and cookie chunks, and placed the sliced sponge cake (split into half) on top to create a butterfly design.


Baby Booties! Vanilla cupcake with tnted buttercream, decorated with piped baby booties and sprinkles of colourful stars. As you can see, the booties were not very nicely done. The royal icing turned hard (should have covered with damp cloth or plastic wrap) and my hands ached after I finished with the piping.
When everything was done, it was already 4am in the morning! Just in time to handover next morning. :)
I still have not heard from the host the verdict but a few who went to the celebration said the cupcakes were delicious. :) I do hope the guest enjoyed the cupcakes and also apologize for the 'not so neat and professionally done' frostings/decorations.
Thanks Yan Li for giving me the opportunity! This little venture made me realised that yes, I do have a passion in baking, it's not a 3-minute passion only. I don't feel tired from working on the cupcakes even till the wee hours (of course I will feel tired but you just won't want to give up) and I don't feel bored having to try out so many recipes and done so much cleaning and washing till my hands became dry.
I don't think I'll be doing any cupcke venture for now but I'm now beginning to focus on baking a certain item so that I can improve/perfect my skills at it instead of merely doing everything but aren't able to bake something I'm really good at. For a start, I'm working on buttercakes, kinda of working through wat I've learnt in my baking class at Creative Culinaire. Even though I don't really like butter cakes, this is the most basic that I think I should be able to bake without failing, as i failed in some recipes during my trial and errors.
Wish me luck then and Happy Baking! :)

August 10, 2009

Problems with Posting :(

I've been wanting to post up my recent bakes but when I created a new post, the usual editing bar (where you upload images, change the font and create a link) is not available!

Any idea what had happened or is it only my pc experience this problem? There is an "error on page" message at the bottom left corner. If anyone know what is the problem do enlighten me :)

I'd love to post up soon! Thank you folks! :D