Hence, i signed up for a foundation cake making at Creative Culinaire. The foundation class comprises 4 lessons in total, each week focusing on a certain cake type. I've already attended 3 lessons so far (butter cakes, chiffon cakes and swiss rolls) and my last lesson would be sponge cakes.
Although the cost of the 4 lessons is not cheap, I enjoyed the lessons and I would say I have certainly benefitted from all the classes I've attended so far. Chef Judy Koh is a very approachable lady with a good sense of humour! She looks younger than in the photos (of her published books). This foundation class is definitely useful for newbies who had never baked before but had just started to have an interest in baking. It provides the basic foundation of what you need to know about cake baking but thereafter you should practice in order to master the technique. For me, I've already understand most of the theories and types of method but I've learnt some tips from Judy and hands-on techniques which I would not be able to grasp easily from books or online resources, such as whipping of egg whites and rolling a swiss roll. :D
I'm also much relieved to get the assurance that home-made cakes usually would never achieve the same softness as commercial-baked cakes because emulsifier is added most of the time to keep it soft and stay fresh longer. It also helps to stabilise air bubbles which is created and important in maintaining cake softness in any type of cake. .jpg)
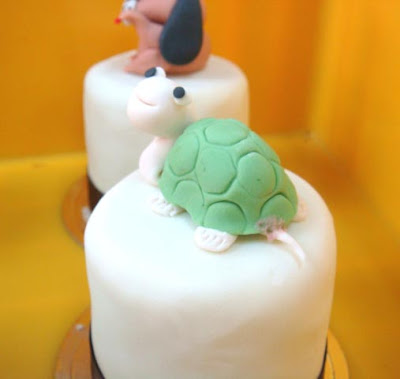
These are some of the butter cupcakes I made during my first lessons.
.jpg)
.jpg)
.jpg)
.jpg)
.jpg)
.jpg)
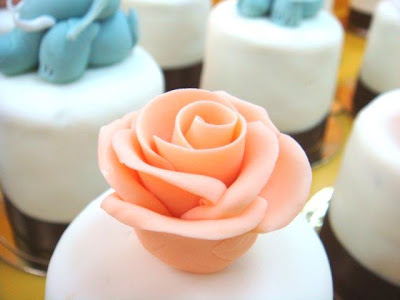
These were the wedding cupcakes they customised for a pair of couples who is a doctor (A vet if I remember correctly) and an accountant.
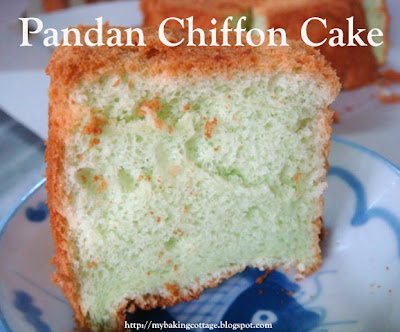.jpg) This was my successful pandan chiffon cake after attending her class. I overwhipped a batch of egg whites during my first lesson (for a walnut butter cake) and I guess I now know how does overwhipping of egg whites looks like. However, stand mixer and my handheld mixer is different so I'm still learning how to slow down and adjust to my equipment. :) Some tips for you people: - sugar helps to stabilize egg whites, hence feel free to 'shift' some of the sugar in the egg yolk batter to the egg whites for higher stability, but do ensure that the weight of the sugar in the egg whites should not be greater than the weight of egg whites.
This was my successful pandan chiffon cake after attending her class. I overwhipped a batch of egg whites during my first lesson (for a walnut butter cake) and I guess I now know how does overwhipping of egg whites looks like. However, stand mixer and my handheld mixer is different so I'm still learning how to slow down and adjust to my equipment. :) Some tips for you people: - sugar helps to stabilize egg whites, hence feel free to 'shift' some of the sugar in the egg yolk batter to the egg whites for higher stability, but do ensure that the weight of the sugar in the egg whites should not be greater than the weight of egg whites.
.jpg)
.jpg)
.jpg)
.jpg)
.jpg)
.jpg)
.jpg)
These were the wedding cupcakes they customised for a pair of couples who is a doctor (A vet if I remember correctly) and an accountant.
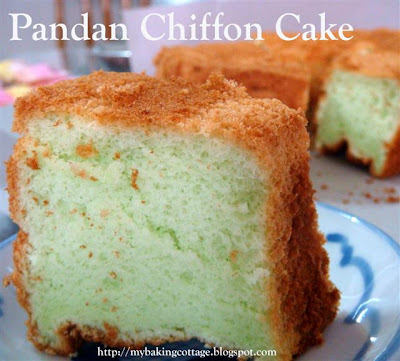
.jpg) This was my successful pandan chiffon cake after attending her class. I overwhipped a batch of egg whites during my first lesson (for a walnut butter cake) and I guess I now know how does overwhipping of egg whites looks like. However, stand mixer and my handheld mixer is different so I'm still learning how to slow down and adjust to my equipment. :) Some tips for you people: - sugar helps to stabilize egg whites, hence feel free to 'shift' some of the sugar in the egg yolk batter to the egg whites for higher stability, but do ensure that the weight of the sugar in the egg whites should not be greater than the weight of egg whites.
This was my successful pandan chiffon cake after attending her class. I overwhipped a batch of egg whites during my first lesson (for a walnut butter cake) and I guess I now know how does overwhipping of egg whites looks like. However, stand mixer and my handheld mixer is different so I'm still learning how to slow down and adjust to my equipment. :) Some tips for you people: - sugar helps to stabilize egg whites, hence feel free to 'shift' some of the sugar in the egg yolk batter to the egg whites for higher stability, but do ensure that the weight of the sugar in the egg whites should not be greater than the weight of egg whites. I'm looking forward to my last lesson next week and shall be back to my home baking routine. :) I still miss the freedom of baking as a hobby and trying out new recipes. :P
.jpg)
.jpg)
.jpg)
.jpg)
.jpg)
.JPG) We had our lunch at A&W, something already non-existent in Singapore! Their root beer float was awesome! I remembered having it at Ang Mo Kio when I was young! I had their waffles with ice-cream during our first trip but not this time cos' wanna save my stomach for other food :D
We had our lunch at A&W, something already non-existent in Singapore! Their root beer float was awesome! I remembered having it at Ang Mo Kio when I was young! I had their waffles with ice-cream during our first trip but not this time cos' wanna save my stomach for other food :D.jpg)
.jpg) Our next morning breakfast spread. :) The quality of food was not too bad but the spread could have ben better. They did'nt serve my favourite cereals with milk. >_<
Our next morning breakfast spread. :) The quality of food was not too bad but the spread could have ben better. They did'nt serve my favourite cereals with milk. >_< .jpg)
.jpg)
.jpg)
.jpg)
.jpg)